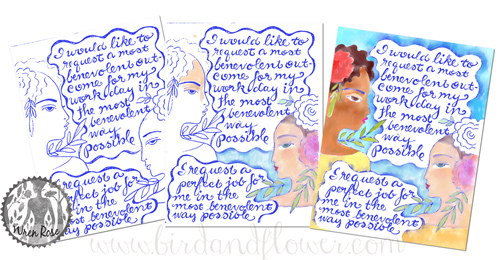
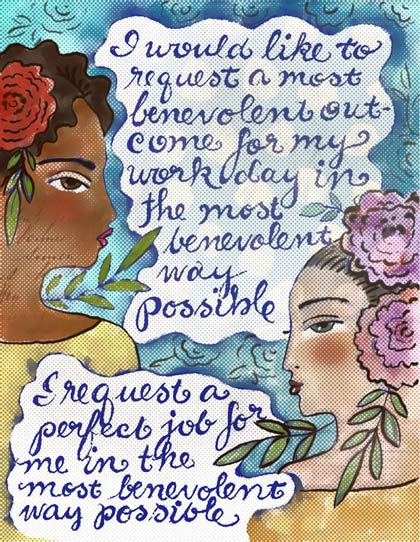
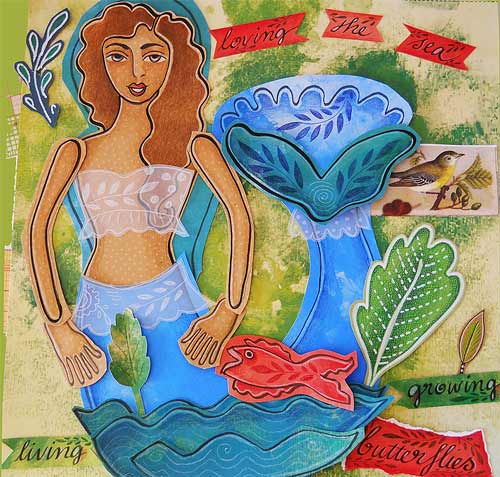
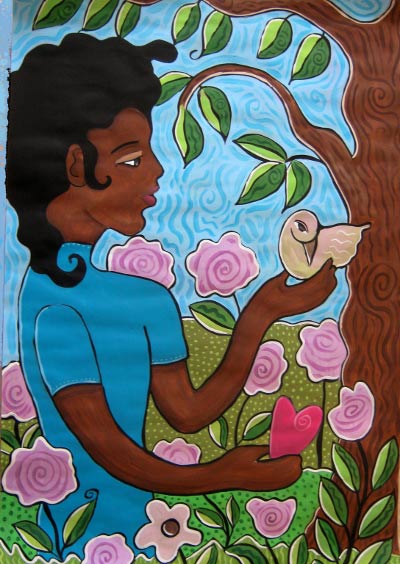
Print making + mixed media


Print making and mixed media:Simple techniques and projects for mixed media and fabric


What I liked about this book, is the way it makes several printing techniques accessible. I was able to start right away and the first one I chose to experiment with was Collagraphy

The supplies were easy enough to get and many I had on hand.
(photo of supplies)
The one thing I did not have was the ink. I chose Versatex Screen Printing Ink because I planned to do paper and fabric and the kit with an assortment of colors was under 20.00.


First I created a plate using cardboard and file folders
Then I inked then up rolling the ink with a brayer and applying it to the plate.


My results varied until I got the hang of how much ink to roll on and how much pressure needed to be applied.


I like the way the letters stand out and the way it enhances simple designs.
The one on the left was done on a lightweight bristol vellum, and the one on the right was done on textured resume paper.


The ink dries fast so soon after I was able to color with chalk. Next steps: I want to try a more complex design and then try printing it on fabric.

Last week of BIG

Here are some of the paintings I did in the BIG class, I completed 26 paintings. I felt a surge of joy that I haven't felt in a long time. I was hoping this class would be a catalyst I was hoping it would help me to open up to some of my dreams and goals and I have to say that it did. The class lived up to its promises.


These are large paintings about 24 x 30 (exact size to be inserted later)
I will post more in various spots, on my blog, on Flickr.

I think for a long time the biggest painting I have ever completed has been 15 x 20, and I've only done one and that was many years ago. Most of the work I do is small, like shrink plastic and paper dolls.

I was worried I wouldn't have anything to paint. not with Connie as a teacher. The paitnings just came pouring out of me.

I haven't even done my super big painting yet. I have to make room for it.

BIG

I am taking a class with CONNIE HOZVICKA. Words cannot describe her energy. To be in her class is like flying.


I am finally overcoming my fear of the blank page. I do a lot of paintings, and art and projects, but I have always had a kind of stage fright when it comes to the blank page. it is very difficult for me to start. I procrastinate, I eat, I avoid, I stare blankly, I quickly find something else to do.

This class has been so healing for me. I have done approximately 22 paintings, and the ideas and creative energy is just pouring through me. I haven't felt this excited about my work in a long time.

Calligraphy papers

I love writing with calligraphy markers, so I thought I would show a little of my process. I take white construction paper in the larger size and a black zig calligraphy marker and write and doodle mostly favorite words and shapes that just flow from the pen.


I do a light acrylic wash of color over the letters, it clouds them a little. Then I take a black Sharpie and sharpen the lines of the words. I embellish the shapes and spaces around them with colored pencils.


More finished papers:


Paper mache dolls

Here are some experiments I have been doing in paper mache. No patterns for these. First I cut out the cardboard shape. I covered them with paper mache strips. Then they were sanded and painted.


Then I added colorful detail. This is a work in progress. The details are in white pen and the color is soft pastels.

Hand painted fabrics

Fabrics


Swatches for a paper doll project.

Hand made journal

This is a journal that I am currently playing with.
I love using the techniques that I used, acrylic paint,
pastel, rubberstamps, colored pencils, collage and markers.


These are not the final words. The stamped words are like
supplies. I will arrange them later to say what i want to say.

Copper Embossing

Playing around with embossing on metal has really been fun.
I cut the randomly cut the pieces into rectangles and with a plain
embossing tool with a tiny ball tip I sketch little drawings.


I dip the piece in a liver of sulfur solution, that darkens the copper.
The fun part for me is buffing the piece and seeing the final result.

Some Paintings I am working on

Here are a variety of paintings that I am playing with using acrylic
paint and pastels:


They may become new paper dolls.

Interesting way to design

I love scrapbook papers for my paper dolls. I have often wondered
if I could design some myself. Here are my first attempts:


I could use these same images over and over with different color-ways.

Work Process

One way that I like to work is to create collage elements from my drawings, cut them
out, and photograph them in different layouts. I use these pictures as a virtual sketchbook.


Navigating my blog....

I decided: No dates! I will not mark dates on this blog because it will have work in progress and I will be adding to individual posts all the time. This flexiblity works for me, I'll have more freedom on when and how I update or add things to it.

I have lots of work that does not fit into the I just did it category.
I might want to post something again in five minutes!Since the posts are organized by month on the side, that's all I need.....

Altered book - Work in progress

I am in the first stages of working on this book. The pages are covered with kraft paper and stencilled. Now I am making the figures and the text.


This is my method for doing affirmations. I print out the affirmations that I want to use and set my intention for using them. Most of the time it is to raise my life condition(vibration), or to put healing energy in my work.


In my mind each figure is a teacher. They are drawn with colored pencil on black paper.
Playing around with the placement, and arranging the words is how I like to work with positive statements.

Ancient Egyptian mixed media hand-made book

I am amazed and inspired by the beauty of Ancient Egyptian writing. Simple and complex, I can see why it was considered sacred. I used some of the hieroglyphs to create a journal for picutes and words.


Here is what some of the pages look like:


The pages are light kraft paper cut to size. The pages are crumbled up, then ironed flat. This ages the paper beautifully.


Each page is rubber-stamped with Ancient Egyptian rubber stamps.


Each page has a flap which is printed paper with a hand colored picture of a heirglyph.


The pages are taped together with clear matte contact paper strips.


The first and last pages are sliped into a paste paper book cover. if needed the cover can be reinforced with cardstock.


Smaller color-copies of the hieroglyph symbols are glued to the end flaps.


Links to the rubberstamps and the heiroglyph sheets available for purchase will be featured here.(link not yet working)